Serverless構築が予想以上に長くなってしまったため、2章立てでお送りします。
前回の記事: LocalStackが正式リリースされたので試してみた(その1 セットアップ編) - cer12uのメモ
AWSコマンドでserverlessサービスを構築
前回作成したLocalStackを使って、Lambda + API Gatewayでローカルserverlessを立ててみます。
こちらのページが良くまとまっているので、今回はこれをパク参考にしました。
LocalStack入門(第5回) ブラウザからのアクセス方法~API GatewayからLambda関数起動
1. 実行用Lambdaの用意
1-1. 実行用のLambda関数の用意
Lambdaに上げるためのPythonデータをローカル環境に用意します。
pythonファイルを作成
$ vi lambda_environment.py
import json
def handler(event, context):
    return {
        'statusCode' : 200,
        'headers' : {
            'content-type' : 'text/html'
        },
        'body' : event['queryStringParameters']['a']
    }
アップロード用にZIP圧縮
$ zip lambda_environment.zip lambda_environment.py
1-2. awslocalで登録
作成したファイルをawslocalでLambdaに登録します。
awslocal lambda create-function --function-name lambda_function_handler --runtime python3.9 --handler lambda_environment.handler --memory-size 128 --zip-file fileb://lambda_environment.zip --role arn:aws:iam::0000000000:role/role-name
返却されるjsonはこちら
FunctionArnは別途使いますので、メモしておきます。
{
    "FunctionName": "lambda_function_handler",
    "FunctionArn": "arn:aws:lambda:us-east-1:000000000000:function:lambda_function_handler",
    "Runtime": "python3.9",
    "Role": "arn:aws:iam::0000000000:role/role-name",
    "Handler": "lambda_environment.handler",
    "CodeSize": 335,
    "Description": "",
    "Timeout": 3,
    "MemorySize": 128,
    "LastModified": "2022-07-26T12:17:10.355+0000",
    "CodeSha256": "9GKC1UVcfma25VtwtMKG96zIH6T+i7caq/phNYM8ebo=",
    "Version": "$LATEST",
    "VpcConfig": {},
    "TracingConfig": {
        "Mode": "PassThrough"
    },
    "RevisionId": "2ca54669-bf54-40cc-9015-ad407ea4c530",
    "State": "Active",
    "LastUpdateStatus": "Successful",
    "PackageType": "Zip",
    "Architectures": [
        "x86_64"
    ]
}
1-3. API GatewayのAPI環境を作成する
まずはエンドポイントを作成します。
ローカルなので名前は適当に「testapi」でいきます。
awslocal apigateway create-rest-api --name 'testapi'
結果はこちら。
この後、idの項目を使いますのでメモしましょう。
{
    "id": "jkhv86jblq",
    "name": "testapi",
    "createdDate": 1658837952.0,
    "version": "V1",
    "binaryMediaTypes": [],
    "apiKeySource": "HEADER",
    "endpointConfiguration": {
        "types": [
            "EDGE"
        ]
    },
    "tags": {},
    "disableExecuteApiEndpoint": false
}
1-4. API GatewayのルートリソースIDの取得
後で必要になるため、エンドポイントのルートリソースIDを調べておきます。
awslocal apigateway get-resources --rest-api-id <1-3のID>
# 例: awslocal apigateway get-resources --rest-api-id jkhv86jblq
結果のid項がリソースIDです。
{
    "items": [
        {
            "id": "g8hj8uj8xy",
            "path": "/"
        }
    ]
}
1-5. API Gatewayのリソース作成
API Gatewayの仕組みに合わせて、URLのパスを設定
awslocal apigateway create-resource --rest-api-id <1-3のID> --parent-id <1-4のID> --path-part env_test
# 例: awslocal apigateway create-resource --rest-api-id jkhv86jblq --parent-id g8hj8uj8xy --path-part env_test
応答はこちら。ここもidを記録しておきます。
{
    "id": "c73yv44rzx",
    "parentId": "g8hj8uj8xy",
    "pathPart": "env_test",
    "path": "/env_test"
}
1-6. API Gatewayの認証設定を行う
今回はテストなので、認証なしで設定します。
awslocal apigateway put-method --rest-api-id <1-3のID> --resource-id <1-5のID> --http-method GET --authorization-type "NONE"
# 例: awslocal apigateway put-method --rest-api-id jkhv86jblq --resource-id c73yv44rzx --http-method GET --authorization-type "NONE"
ここでは保存する項目はありません。
{
    "httpMethod": "GET",
    "authorizationType": "NONE",
    "apiKeyRequired": false,
    "methodResponses": {}
}
1-7. API GatewayとLambdaの接続
API Gatewayで指定するURIは、Lambdaのお作法に沿ってこの形式にする必要があるようです。
arn:aws:apigateway:us-east-1:lambda:path/2015-03-31/functions/<LambdaのFunctionARN名>/invocations
# 例: arn:aws:apigateway:us-east-1:lambda:path/2015-03-31/functions/arn:aws:lambda:us-east-1:000000000000:function:lambda_function_handler/invocations
それでは、LambdaをAPI Gatewayに接続します。
コマンドはこちら
awslocal apigateway put-integration --rest-api-id <1-3のID> --resource-id <1-5のID> --http-method GET --type AWS_PROXY --integration-http-method POST --uri <URI> --passthrough-behavior WHEN_NO_MATCH
# 例: awslocal apigateway put-integration --rest-api-id jkhv86jblq --resource-id c73yv44rzx --http-method GET --type AWS_PROXY --integration-http-method POST --uri arn:aws:apigateway:us-east-1:lambda:path/2015-03-31/functions/arn:aws:lambda:us-east-1:000000000000:function:lambda_function_handler/invocations --passthrough-behavior WHEN_NO_MATCH
レスポンスはこちら、特に記録する部分はありません。
{
    "type": "AWS_PROXY",
    "httpMethod": "POST",
    "uri": "arn:aws:apigateway:us-east-1:lambda:path/2015-03-31/functions/arn:aws:lambda:us-east-1:000000000000:function:lambda_function_handler/invocations",
    "requestParameters": {},
    "passthroughBehavior": "WHEN_NO_MATCH",
    "cacheNamespace": "c73yv44rzx",
    "cacheKeyParameters": []
}
1-8. APIの公開
最後に、ここまでで作成したAPI Gatewayを公開します。
awslocal apigateway create-deployment --rest-api-id <1-3のID> --stage-name test
# 例: awslocal apigateway create-deployment --rest-api-id jkhv86jblq --stage-name test
結果はこちら。
{
    "id": "ltq5d03f7y",
    "createdDate": 1658839374
}
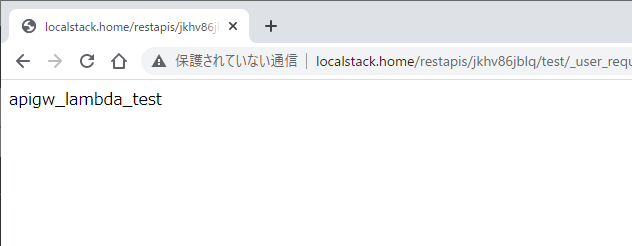
1-9. 疎通確認
LocalStack v1.0はlocalhostの4566番ポートで起動しているため、実機でcurlを使って動作確認してみます。
curl http://localhost:4566/restapis/<1-3のID>/test/_user_request_/env_test?a=apigw_lambda_test
a=の後ろに設定した文字列が返却されていれば完成です。
別PCからのアクセス (nginx利用)
以前はdocker-composeの設定で対応できたようですが、v1.0からは手順が変わったようです。
リリース直後で設定方法が見当たらなかったため、今回はnginxでリバースプロキシを設定して対応します。(LocalStack自体で設定する方法をご存じでしたら教えてください…)
nginxの準備
$ sudo dnf install nginx
$ sudo firewall-cmd --add-service=http --permanent
$ sudo firewall-cmd --reload
$ sudo nano /etc/nginx/nginx.conf
localhostの4566番ポートを公開
~~略~~
        location / {
          proxy_pass http://127.0.0.1:4566/;
        }
~~略~~
$ sudo systemctl start nginx
設定後、LocalStackで作成したURLにアクセスして接続できれば完成です。
おわりに
これでServerless環境を構築できました、LocalStackはAWSに慣れている方の実験向けといった印象です。
今回はCLIコマンドで作成しましたが、CloudFormationの検証などに使えると良さそうに感じます。